THE FIELD & THE RECORD
Stirling Bridge 1297
A narrow crossing turned numbers into a liability. Read how the Forth divided the English army and how to manage the bridge in play.
11 September 1297 River Forth, Stirling, Scotland
Play this battlefield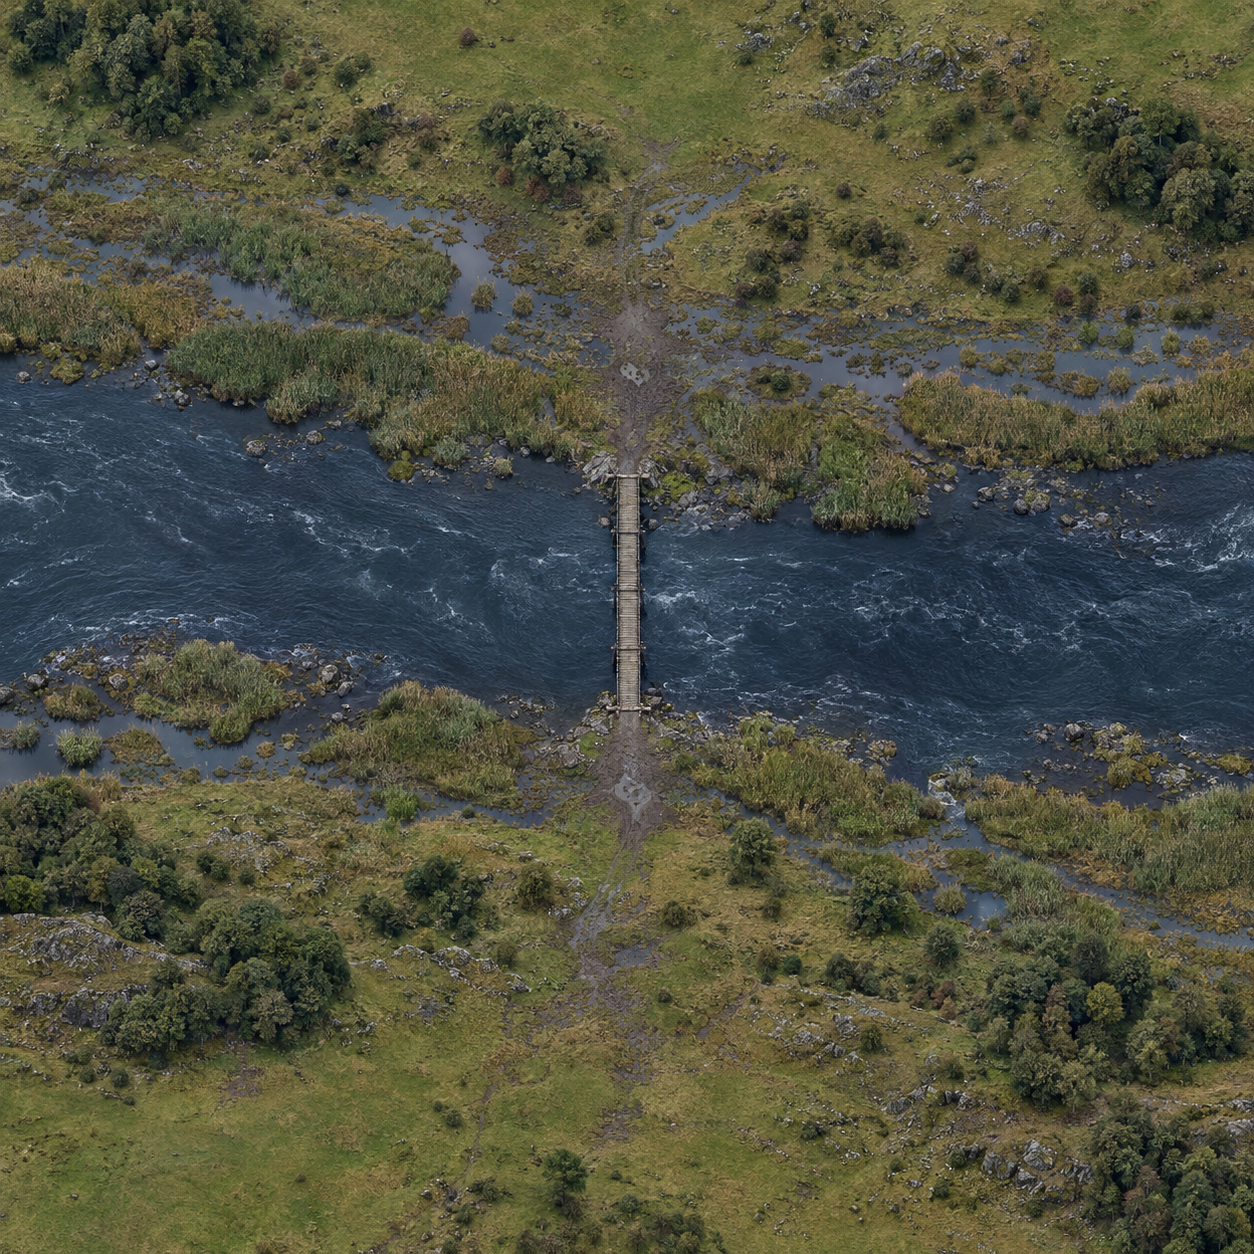
01 / WHAT HAPPENED
The battle and the field
- Opposing forces
- William Wallace and Andrew Moray’s Scots against the English army led by John de Warenne and Hugh de Cressingham.
- Outcome
- Scottish victory; Cressingham was killed, while Moray later died of his wounds.
The English army approached from south of the Forth. Wallace and Moray waited on the northern side, associated with Abbey Craig. The English crossed a narrow wooden bridge into ground enclosed by a loop of the river. The Scots attacked after part of the opposing army had crossed, cutting the bridgehead off from the force still on the other bank. [1] [2]
The crossing was the decisive constraint: an army could not deploy its full strength as quickly as it could be attacked. Soft floodplain ground further restricted mounted movement. The contemporary account also discusses a proposed alternative ford, reminding us that the historical landscape offered possibilities beyond the single crossing used in the game. [1]
02 / READING THE RECORD
What history can tell us
Walter of Guisborough gives a substantial contemporary account, but he was an English chronicler rather than an identified eyewitness. His speeches are literary reconstructions. The medieval wooden crossing should not be confused with the surviving later stone bridge. [1]
03 / CONTEMPORARY VOICE
Words from the period
“a pair of horsemen could scarcely and with difficulty cross at the same time”
Contemporary account in the English translation reproduced by Historic Environment Scotland. This describes the bottleneck; it is not a measurement of the bridge’s width.
04 / COMMANDER’S OVERVIEW
Advantages, difficulties and a plan
The following is tactical advice for this game map. Historical terrain informs the scenario; the numerical effects are game rules.
Single bridge
Advantage
A compact force can concentrate against the enemy’s leading companies.
Difficulty
Wide lines cannot fit. Reform before reaching the crossing and leave space for the units following.
Impassable Forth
Advantage
The river protects a flank and makes the enemy’s route predictable.
Difficulty
There is no ford or swimming route in this scenario; losing the bridge can divide your army.
Marshy approaches
Advantage
Slow approaches give a bridge defender time to concentrate.
Difficulty
Marsh prevents charges and costs extra movement; congestion can leave your front unsupported.
Your opening decisions
Cross with a compact leading formation and establish room on the far bank before feeding more troops forward. Cover the exit with missile troops where sight permits. In Field battle the objectives lie north of the centre, so merely holding the southern approach will not secure them.
History and the game map
The straight river band and two-square bridge simplify a winding historical river. The bridge cannot be destroyed. Stirling Bridge supports Field battle and Annihilation; it is unavailable in Defender mode.
05 / FOLLOW THE EVIDENCE
Historical references
Quotations are short extracts. Attributions identify the account’s date and viewpoint; a contemporary author is not necessarily an eyewitness. References checked 31 October 2026.
- Historic Environment Scotland — Stirling Bridge, BTL28
Battlefield inventory, landscape, source criticism and translated extracts from Guisborough.
- National Wallace Monument — The Battle of Stirling Bridge
Overview of the crossing, the trapped English force and the aftermath.
Further reading: Stirling Bridge 1297 on Seven Swords ↗